Photography is important to me. As a result I always have a big heavy DSLR with me when I hike. Carrying such a large bulky camera has proved difficult. I like to keep my camera ready so I can take a picture at a moment’s notice. But carrying the camera in my pack is inconvenient and I find myself skipping pictures I would normally take because I don’t want to dig my camera out of the pack.
 |
| Me with the MYOG Camera Sternum Strap Clip |
Carrying the camera around your neck doesn’t work either. If you have ever tried to hike with a camera around your neck then you know what a pain in the neck it is (no pun intended). As you walk the camera swings side to side (sometimes rather violently) and the strap against your neck is annoying to say the least. In the past I would just hold my camera by my side to avoid wearing it around my neck I always thought…there has to be a better way.
It would be great if I had a way to clip my camera onto my packs sternum strap. With this idea in mind I started brainstorming. The easiest way to mount anything to a camera is the tri-pod mount. Most tri-pods these days have a quick release camera mount. My Sunpack 2001 UT is no exception. I thought there has to be a way I can adapt the quick release assembly to clip to a pack’s sternum strap. Of course tri-pods aren’t cheap (but they have gotten cheaper)… so I started looking for a way to use the tri-pod’s quick release assembly without destroying the tri-pod.
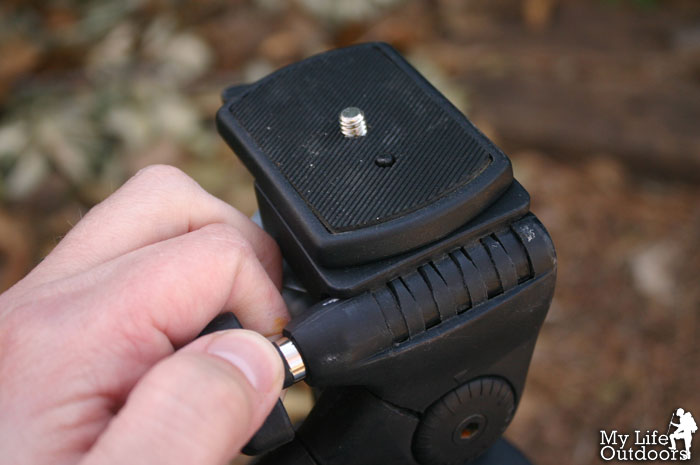
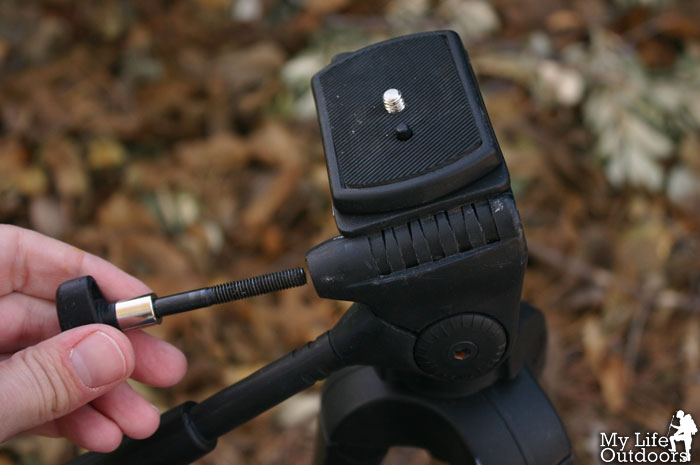
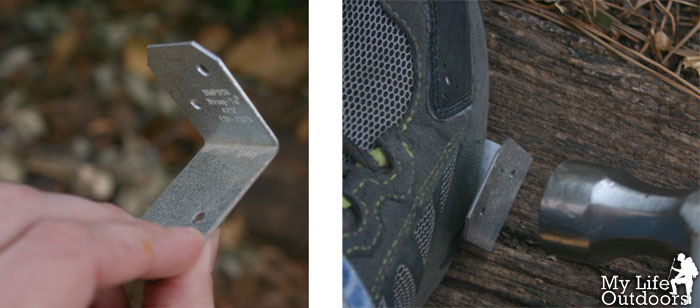
I loosened the adjustment that allows the tri-pod to switch between horizontal and vertical camera orientation and pulled the bolt out. Once the bolt was removed I was able to completely detach the quick release assembly. I had to make sure I didn’t lose the nut that held the bolt in place. I put the nut back on the bolt for safe keeping and put the bolt in my sock drawer (again…for safe keeping).
 |
| Bolt that adjusts the horizontal and vertical camera orientation. |
 |
| Remove the bolt |
 |
| Remove the quick release assembly |
 |
| Be sure not to lose the nut. Screw the nut back onto the bolt for safe keeping. |
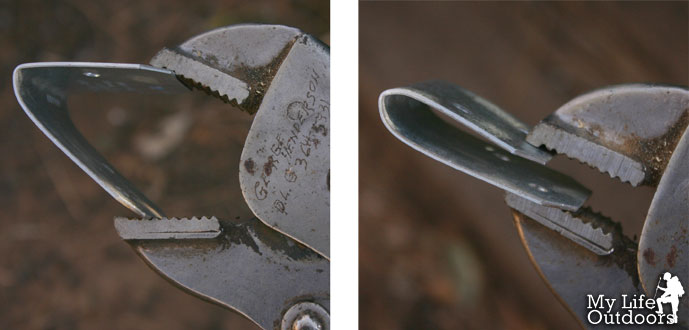
I then looked around for something that I could use to clip the assembly onto my sternum strap. I found a cheap L-bracket at the hardware store. I used a hammer and large pliers to fold the L-bracket into a clip.
 |
| Cheap L-bracket. Use a hammer to fold the bracket over. |
 |
| Use pliers to finish folding the bracket. |
At first I looked for a way to bolt the L-bracket clip onto the quick release assembly. I even looked at drilling a hole in the back of the quick release assembly. But this was all too complicated. So I went to the store and bought strong composite glue capable of bonding to both metal and plastic. I bought Loctite Epoxy which has seemed to work well.
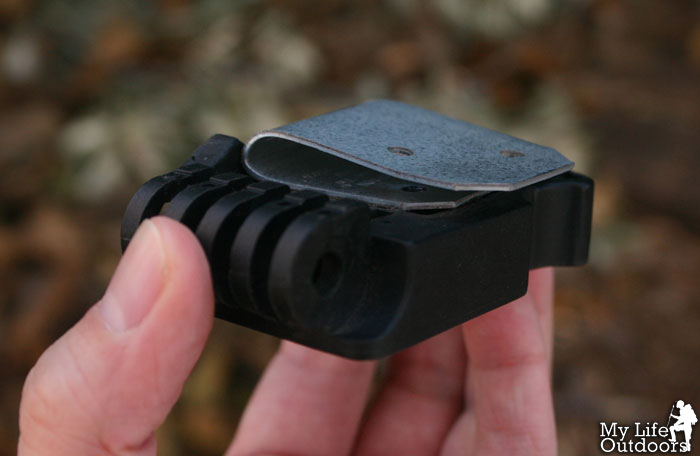
I glued the metal clip to the back of the quick release assembly managing to get it a little crooked right before it bonded. I allowed a few hours for the glue to dry and then clipped the whole thing onto my sternum strap. I slid the clip over my strnum strap…and then went and got my camera. I then attached the quick release plate to the tri-pod mount and clipped it into the assembly.
 |
| L-bracket clip glued to the back of the Quick Release Assembly. A little crooked…oops! |
 |
| L-bracket clip glued to the back of the Quick Release Assembly. |
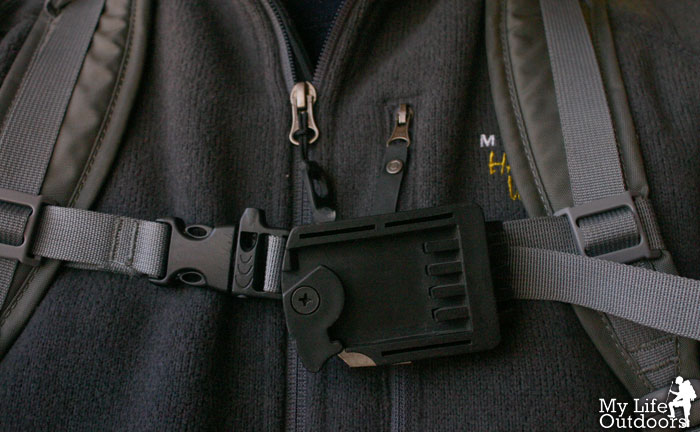
So far I have hiked close to 50 miles with my camera sternum strap mount and have been amazed at the result. I keep the camera strap around my neck in case the clip fails for any reason. (I don’t want my camera falling of the side of a cliff.) The sternum strap clip keeps the strap off my neck and the camera stays put when I walk. When something catches my eye…it is easy to release the camera… snap a picture…. and then put it back.
 |
| Finished Sternum Strap Clip on my pack. |
|
| Here is the camera attached to the Quick Release Sternum Strap Clip. The camera is hanging a bit due to there being no-weight in my pack. |
I think I paid under $5 bucks for both the glue and the L-bracket together. The tri-pod I already had (and paid a lot more for then they sale today). Best part…the permanent metal clip on the back of quick release assembly doesn’t interfere with tri-pod movement. I can reattach the quick release assembly and still use the tri-pod like normal. Just make sure you don’t lose the bolt and nut.
 |
| All the supplies I used: Small L-Bracket, Loctite Epoxy Glue, Tri-pod with quick release head. |
Did you like this post? Please share it with your friends!
Tweet


Anonymous
Clever, creative and useful!
TandR
Great idea. Robin has been going on for quite some time about having a contraption for her camera. A holster or something. I don't think she wants to try anything like this with the new tripod I got her for Christmas though.
Greg
Nice display of ingenuity! Carrying a DSLR is an age old problem whilst hiking I think. You've come up with a good solution!
Steven
Greg,
Thanks…I have been trying to solve this problem for a long time.
TandR
If you don't want to use your new tri-pod I noticed the same one I used in the above post is on sale at Amazon for around $13.00
Anonymous
Great Post, trick excellent solution to carry a DSLR when equipped with big lens. Don't want to bump in or something but I have seen Small digital Cameras like Sony and all and read on Testfreaks about how easy they are to carry aren't they better an valid option?
Ryan
Awesome idea, thanks a ton for posting this! I want to take my D60 on the AT with me this summer and this is a much better deal than dropping $50+ on another bag to wear.
It still looks pretty loose in those pictures… did you have any bouncing at all or was it pretty much stationary the whole time?
Steven
Ryan,
The loose look is because I had nothing in the pack when I took the pic. If you have even 3-4 pounds in your pack it works a ton better. No bouncing really, pretty stationary. I don't hike without it anymore.
Andy Jacobs
Check this out: https://peakdesignltd.com/